All students are provided with a Microsoft 365 account as part of their enrolment. Refer here for more on this.
1. Ensure you are logged out of any personal or work account, otherwise your Cairnmillar details will not show. See: how to log out of another account.
2. Go to OneDrive and if prompted, sign in using your Cairnmillar student email address and password.
Uploading Files or Folders
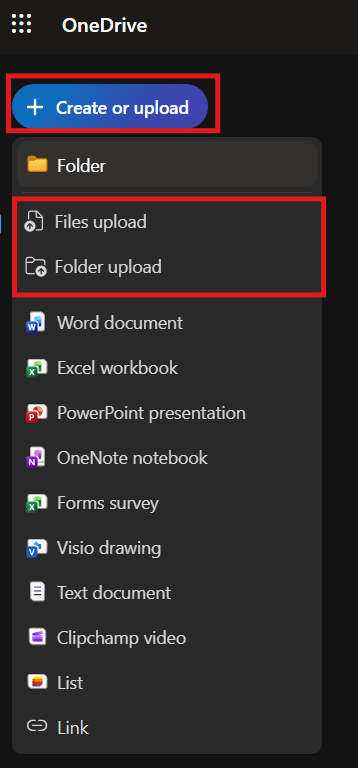
Select the + Create or upload button and choose either Files Upload (to upload a single file) or Folder Upload (to upload a whole folder).
A window pop-up will appear and you will be prompted to select the file or folder you wish to upload.
Creating New Files or Folders
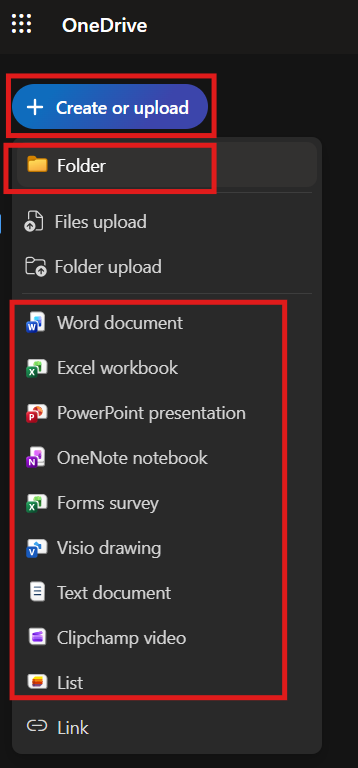
Select the + Create or upload button and choose the type of file that you wish to create or select Folder to create a new folder.
If you select a new document using one of the Microsoft Applications (Word, PowerPoint, Excel, etc.) the application will launch in a new window on your browser with a new document that will automatically save into your OneDrive
Sharing Files or Folders
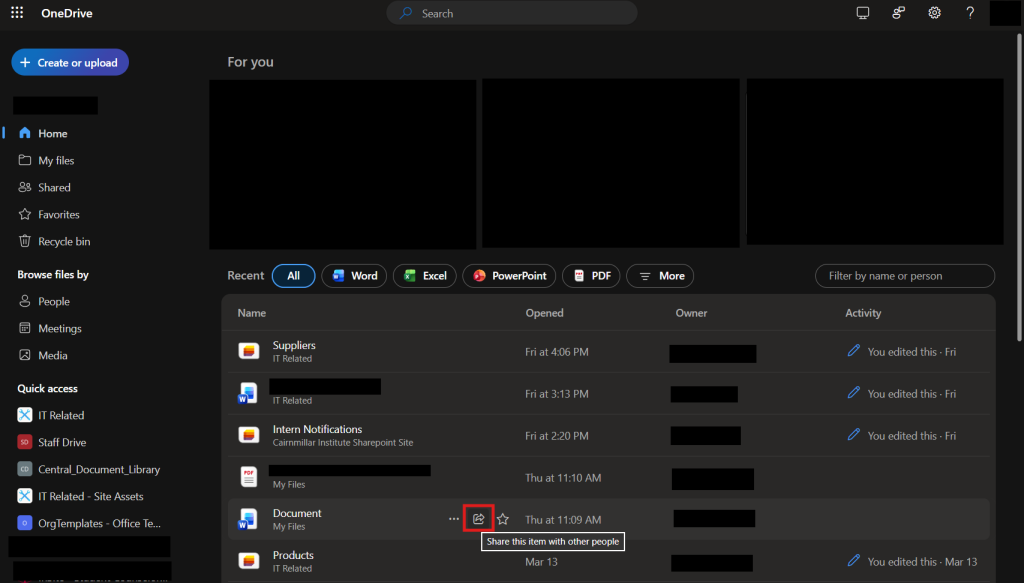
Navigate to the file you want to share in your OneDrive. Hover over the file and select the share icon on the file or folder
.
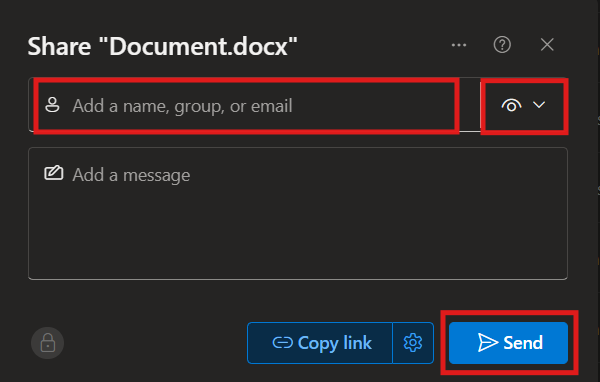
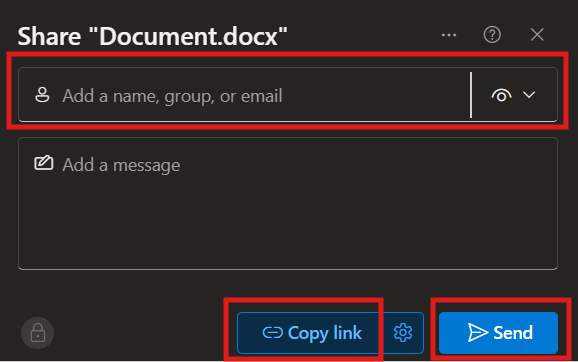
A pop up will appear and you will have two options for sharing the file or folder.
Option 1: Send the file
- Type the email address of the name you want to share the file with (you can add multiple)
- Choose the permission of this file
- Can edit – make any changes
- Can review – suggest changes
- Can view – can’t make changes
- Can’t download – can view, but not download
- Click the blue Send Button
Option 2: Get a shareable link to the file or folder
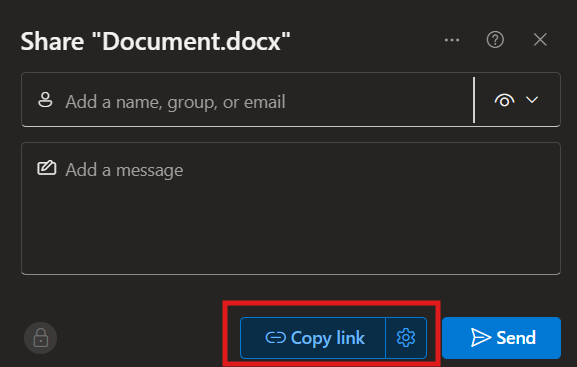
- Click the Copy Link button
- The link to the file or folder can now be pasted wherever you need it to go. For example, in an email.
Sharing Settings
There are several settings that can be chosen when sending a file or sharing a link to a file. (All links set as ‘view only’ by default).
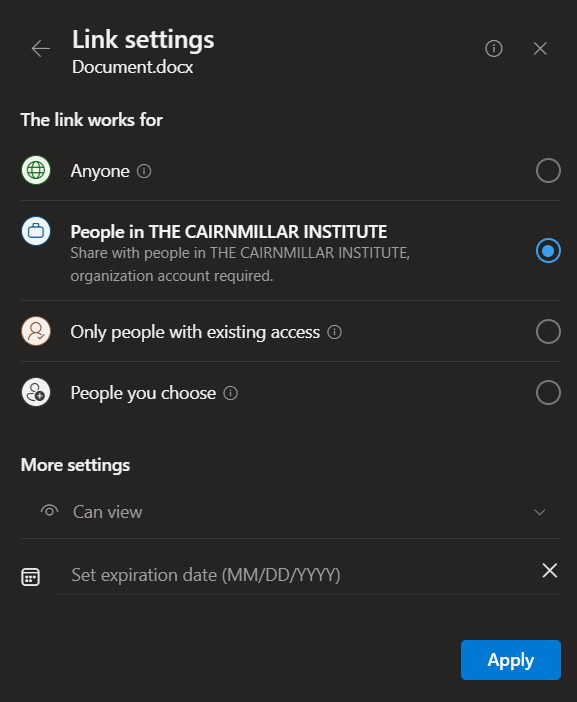
To change who can receive your file, click on the “People in your organisation” line on the share window.
Caution: Be extremely careful and diligent about who you are sending files to and what permissions they have. It is your responsibility to be cybersafe. We STRONGLY recommend you password protect documents you share and/or set a time limit for the link to expire. This will help to keep your information safe and protected.
Option 3: Sharing a File with Specific Individuals/Tutors (Especially for Placement Students)
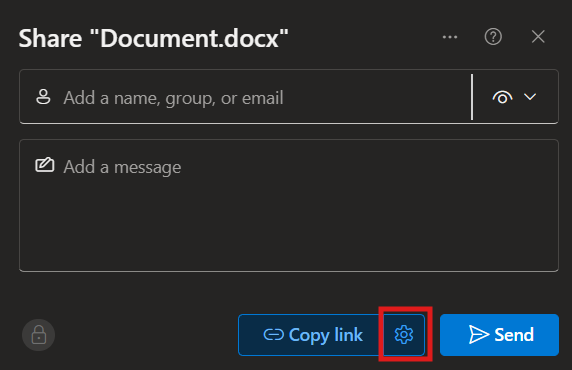
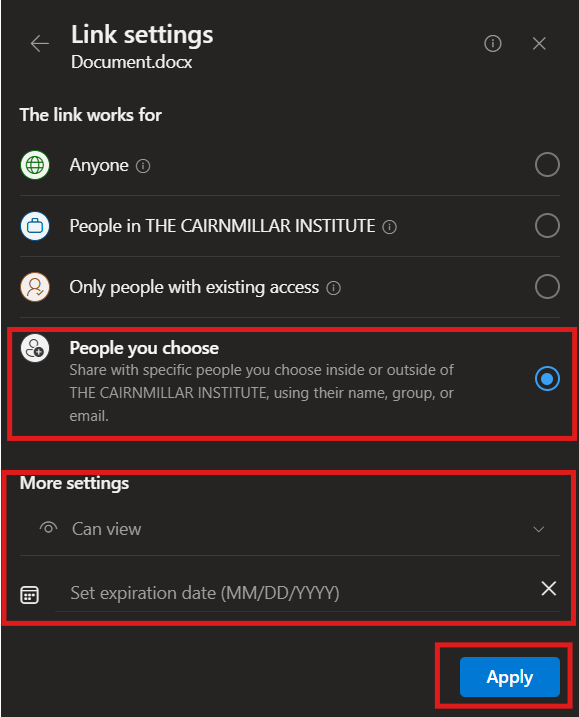
Click on the Share icon, then select the Settings option.
Link Settings
Anyone *Not recommended*
You shouldn’t need to fill out the “Add a name…” field unless you want to grant someone specifically higher access. E.g. You want everyone to have view access except for one person who has edit access.
People in THE CAIRNMILLAR INSTITUTE
You shouldn’t need to fill out the “Add a name…” field unless you need everyone in Cairnmillar plus someone outside Cairnmillar to be able to access it (although this is quite unlikely).
Only people with existing access
Only people who already have access to the folder that the file is in, will be able to access it if they click the link. To give people access, follow the instructions in Option 1.
People you choose *Recommended*
If you select this option and don’t fill in the “Add a name…” field, nobody will be able to access the file using the link
Only the specific people you type into the “Add a name…” field will be able to access your file when using your link.
More Settings
As mentioned above, there are various ways to share or send a file link.
To ensure confidentiality, especially regarding client information, we recommend selecting the “People you choose” option. This ensures that only the specific individuals you share the link with will have access to the file.
Additionally, you can set specific permissions (e.g., view, can’t download or edit) and establish an expiry date for the link, adding another layer of security and control.
Click on Apply button.
Sharing the Link
To share the link you can either:
1. Copy the link by selecting the ‘Copy Link’ option and share it via email, or
2. Enter the recipient’s email address in the “Add a name…” field and click the ‘Send’ button.